
How to host your Strapi project on Heroku

Table of contents
- Prerequisites
- Step 1: Create a Strapi project
- Step 2: Install the required PostgreSQL packages
- Step 3: Add a database.js file
- Step 4: Push your project to GitHub
- Step 5: Create a new Heroku app
- Step 6: Connect your GitHub repo to Heroku
- Step 7: Add Heroku Postgres add-on as the database
- Step 8: Add required environment variables to Heroku
Prerequisites
To get started, you'll need the following:
Step 1: Create a Strapi project
I am assuming that you have already created your Strapi project. If you have not, you can run the following in your terminal:
npx create-strapi-app@latest my-project
If you are brand new to Strapi and want to set up a project, you can check out my video where I create a blog with Next.js, Strapi and GraphQL.. The Strapi setup is in the first half of the video.
Step 2: Install the required PostgreSQL packages
We will be connecting our hosted Strapi project to a PostgreSQL database. We need to install some PostgreSQL packages to our Strapi project to make this possible. Open a terminal and navigate to your Strapi project, then run the following commands
npm install pg-connection-string --save
npm install pg --save
OR if you are using yarn
yarn add pg-connection-string
yarn add pg
Step 3: Add a database.js file
In your Strapi project, you have a config folder. Inside of this folder, create a new folder called env, and inside of that, create a new folder called production. Inside this folder, create a new file called database.js and add the following code
const parse = require('pg-connection-string').parse;
const config = parse(process.env.DATABASE_URL);
module.exports = ({ env }) => ({
  connection: {
    client: 'postgres',
    connection: {
      host: config.host,
      port: config.port,
      database: config.database,
      user: config.user,
      password: config.password,
      ssl: {
        rejectUnauthorized: false
      },
    },
    debug: false,
  },
});
This code will enable us to connect to the database we create in Step 6.
Step 4: Push your project to GitHub
You will need to push your Strapi project to GitHub using Git. If you are reading this tutorial, and are at the point in your career where you are creating content management systems, I am assuming that you already know how to do this. If not, this article explains it well. Once your project is on GitHub, move on to the next step.
Step 5: Create a new Heroku app
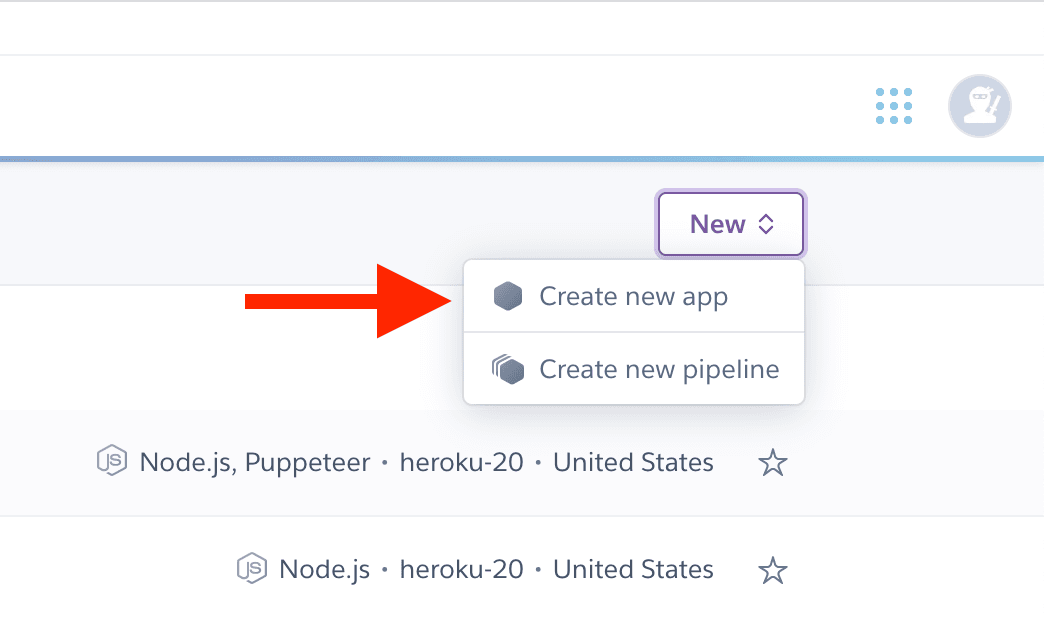
Log in to your Heroku account. On the dashboard, click new, and then create new app.
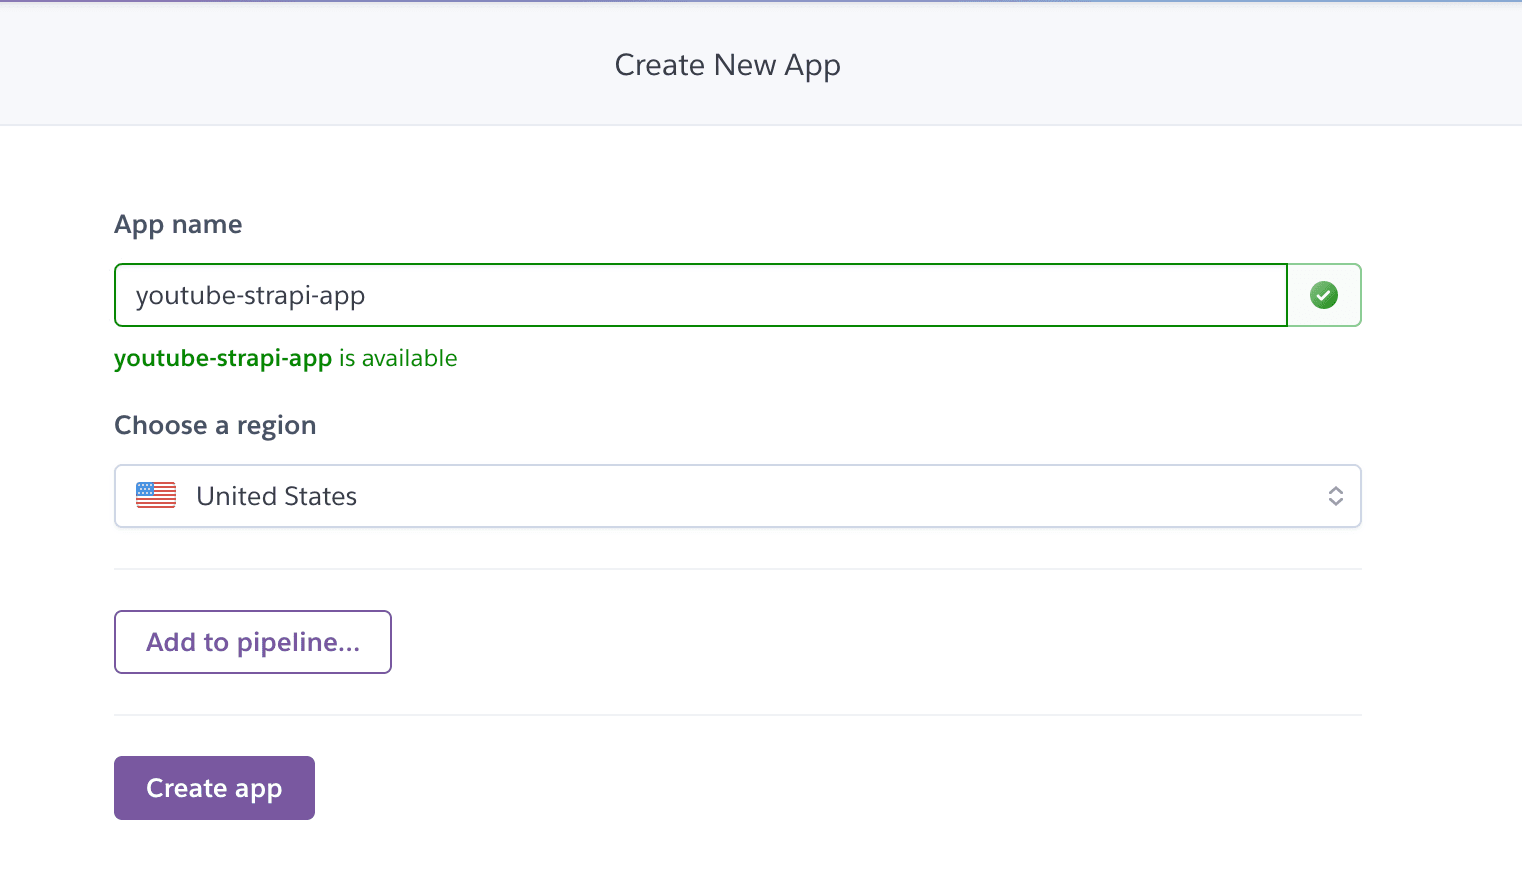
Then, give your project a name, select your region, and click Create app.
Step 6: Connect your GitHub repo to Heroku
We are going to connect the repository we created to Heroku. We will set it up where your project will automatically deploy when we push new changes to our main branch.
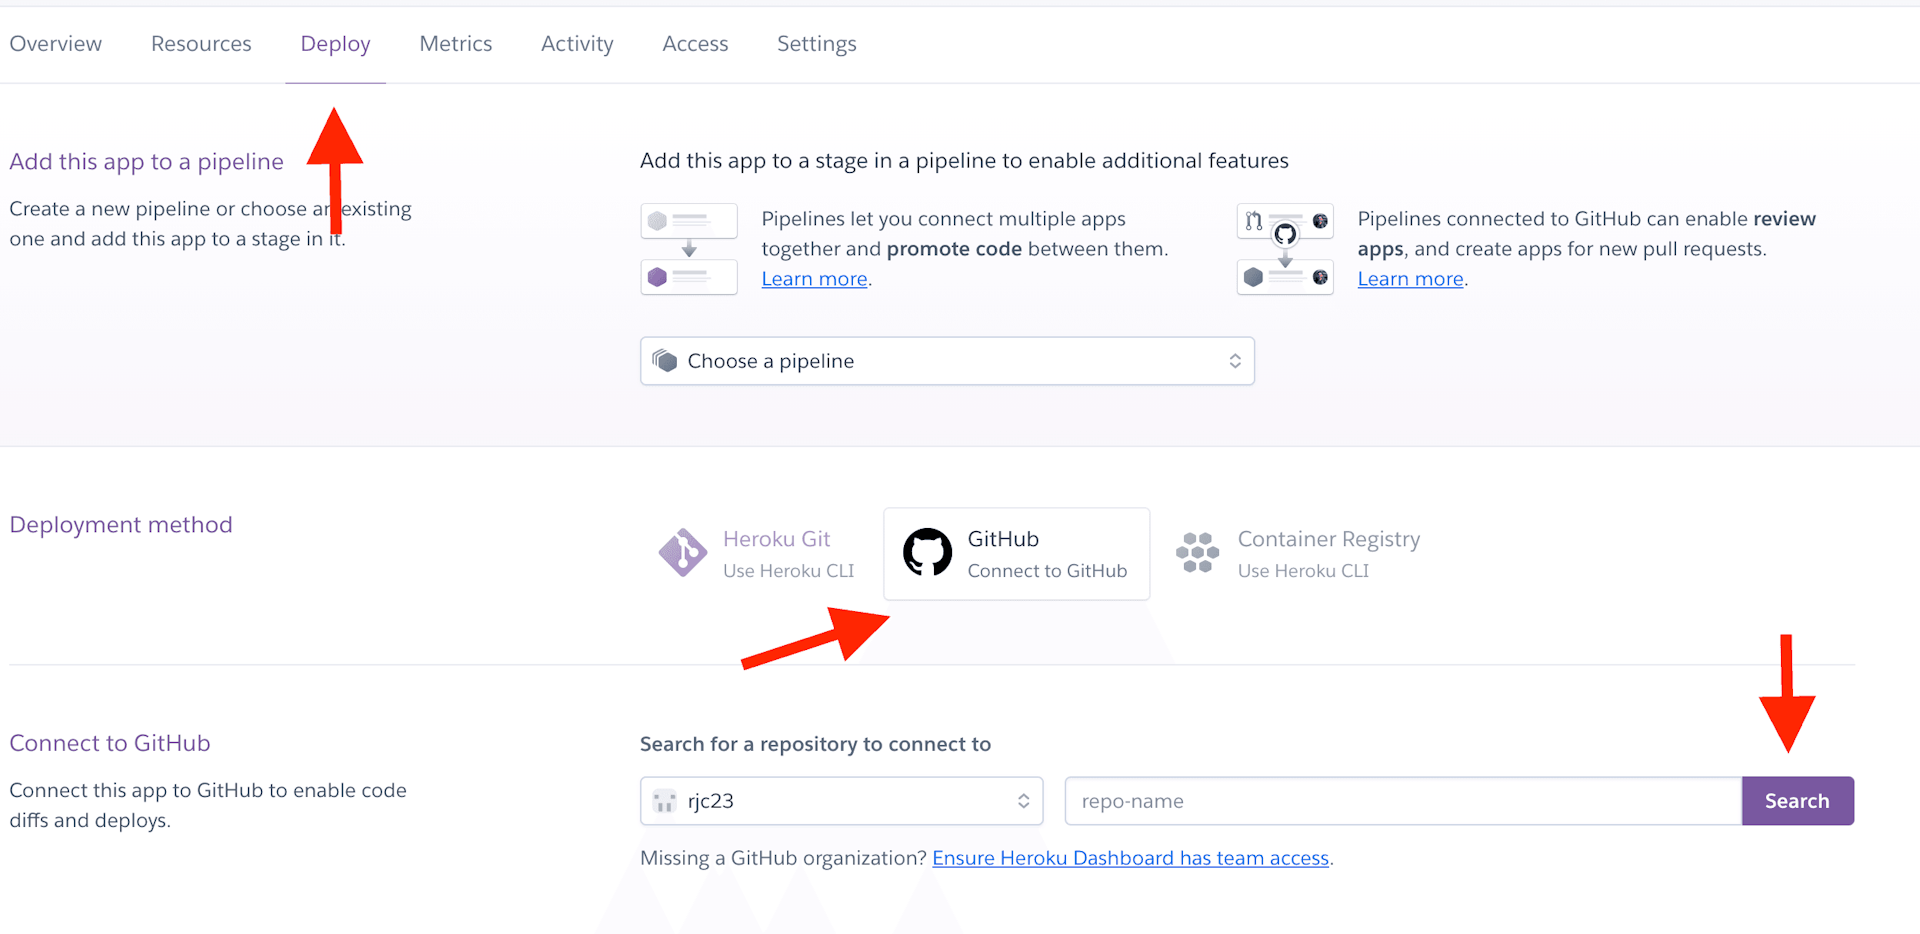
Under the Deploy tab, click on GitHub and then Search. You should be presented with a list of your public repositories. If you have never connected GitHub to Heroku, first click Connect to GitHub and then you will be given the option to Search.
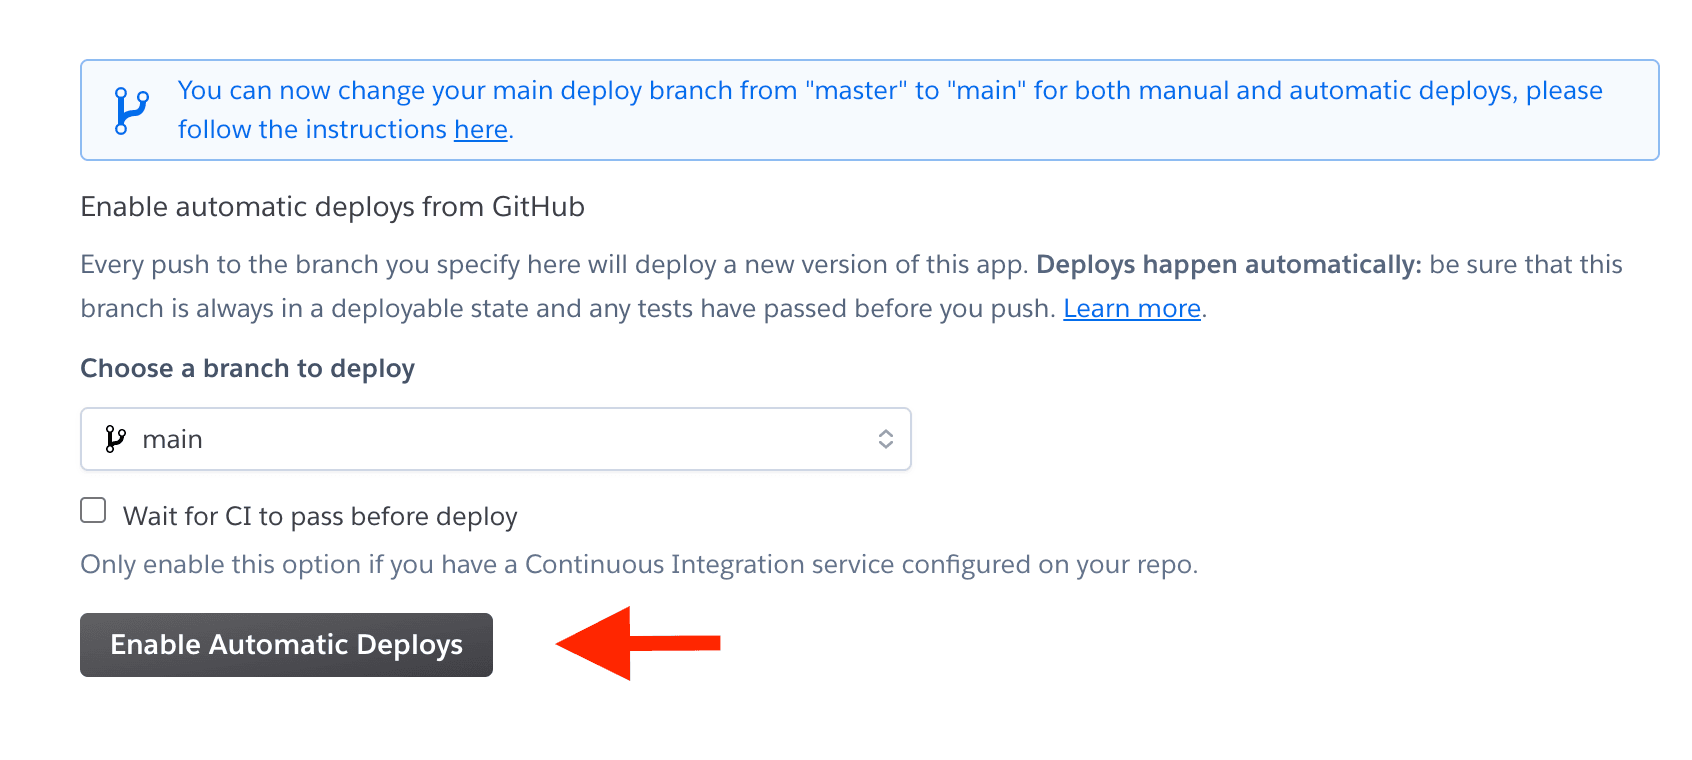
Select your branch and click Connect. This will connect your GitHub repo. The last thing we need to do is enable automatic deploys. To do this, click Enable Automatic Deploys under the Automatic deploys section.
Don't click on Deploy Branch just yet. After step 7, we will return to this page and run a manual deploy.
Step 7: Add Heroku Postgres add-on as the database
As mentioned above, we are going to be connecting our Strapi project to a PostgreSQL database. Heroku has an add-on called Heroku Postgres we will use.
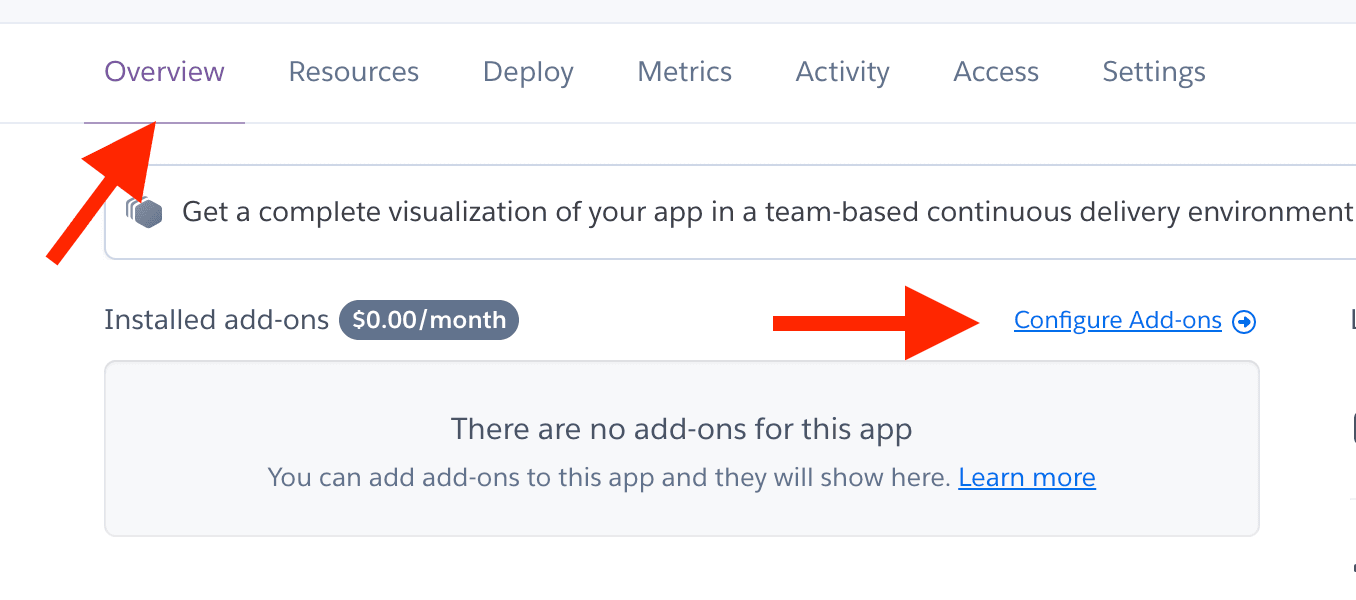
To add this add-on, click Overview and then Configure Add-ons or simply click on the Resources tab.
Search for Heroku Postgres and click on it. You should see a pop-up. Here we can choose the plan we want and add it to our application. For this example, I will add the Hobby Dev - Free plan. Once you have chosen that click Submit Order Form.
Now go back to the Deploy tab, under Manual Deploy, click on Deploy Branch. This is the only manual deployment we will have to do as it will automatically deploy when we push/merge new changes to our main branch on GitHub.
Step 8: Add required environment variables to Heroku
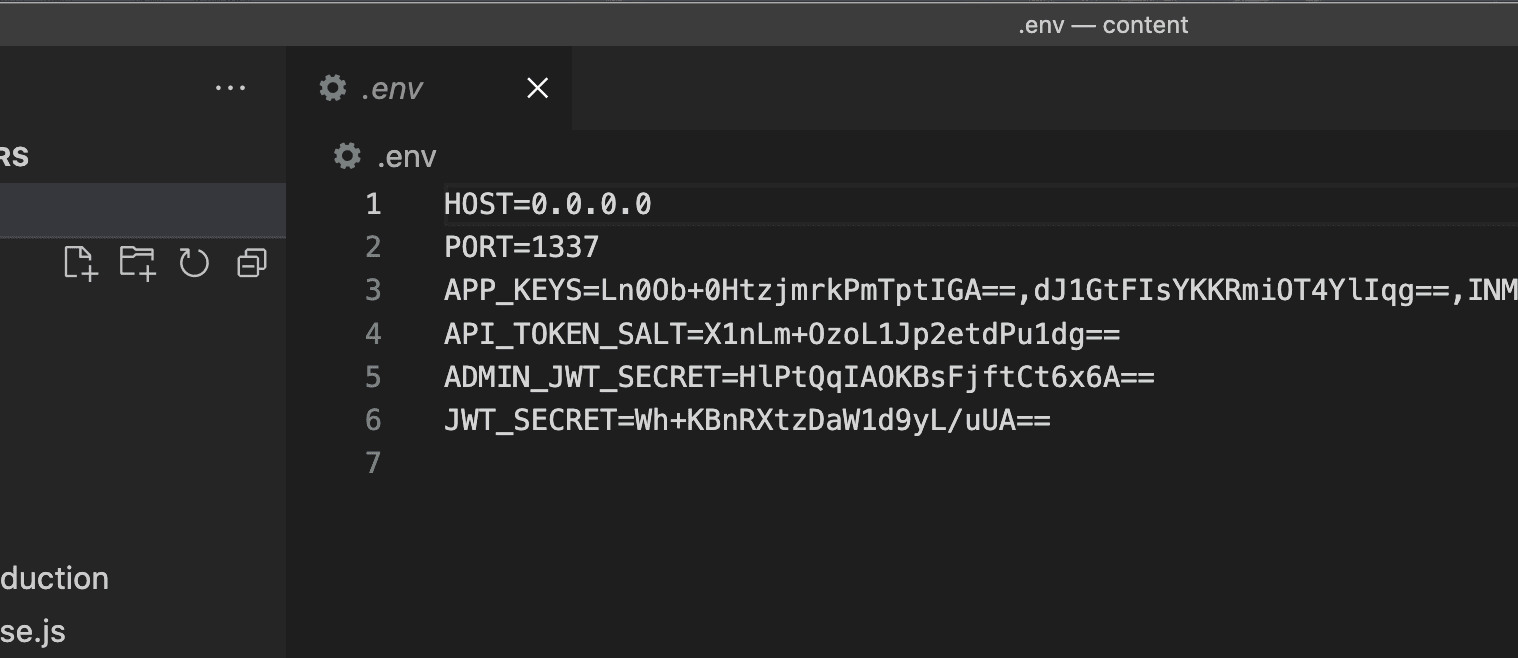
There is just one more thing we need to do before we are done, and that is to add the required environment variables. If we navigate back to the code for the Strapi project, and go to the .env file, you'll notice that there are 4 additional environment variables other than HOST and PORT. They are APP_KEYS, API_TOKEN_SALT, ADMIN_JWT_SECRET and JWT_SECRET. These are used throughout our project.
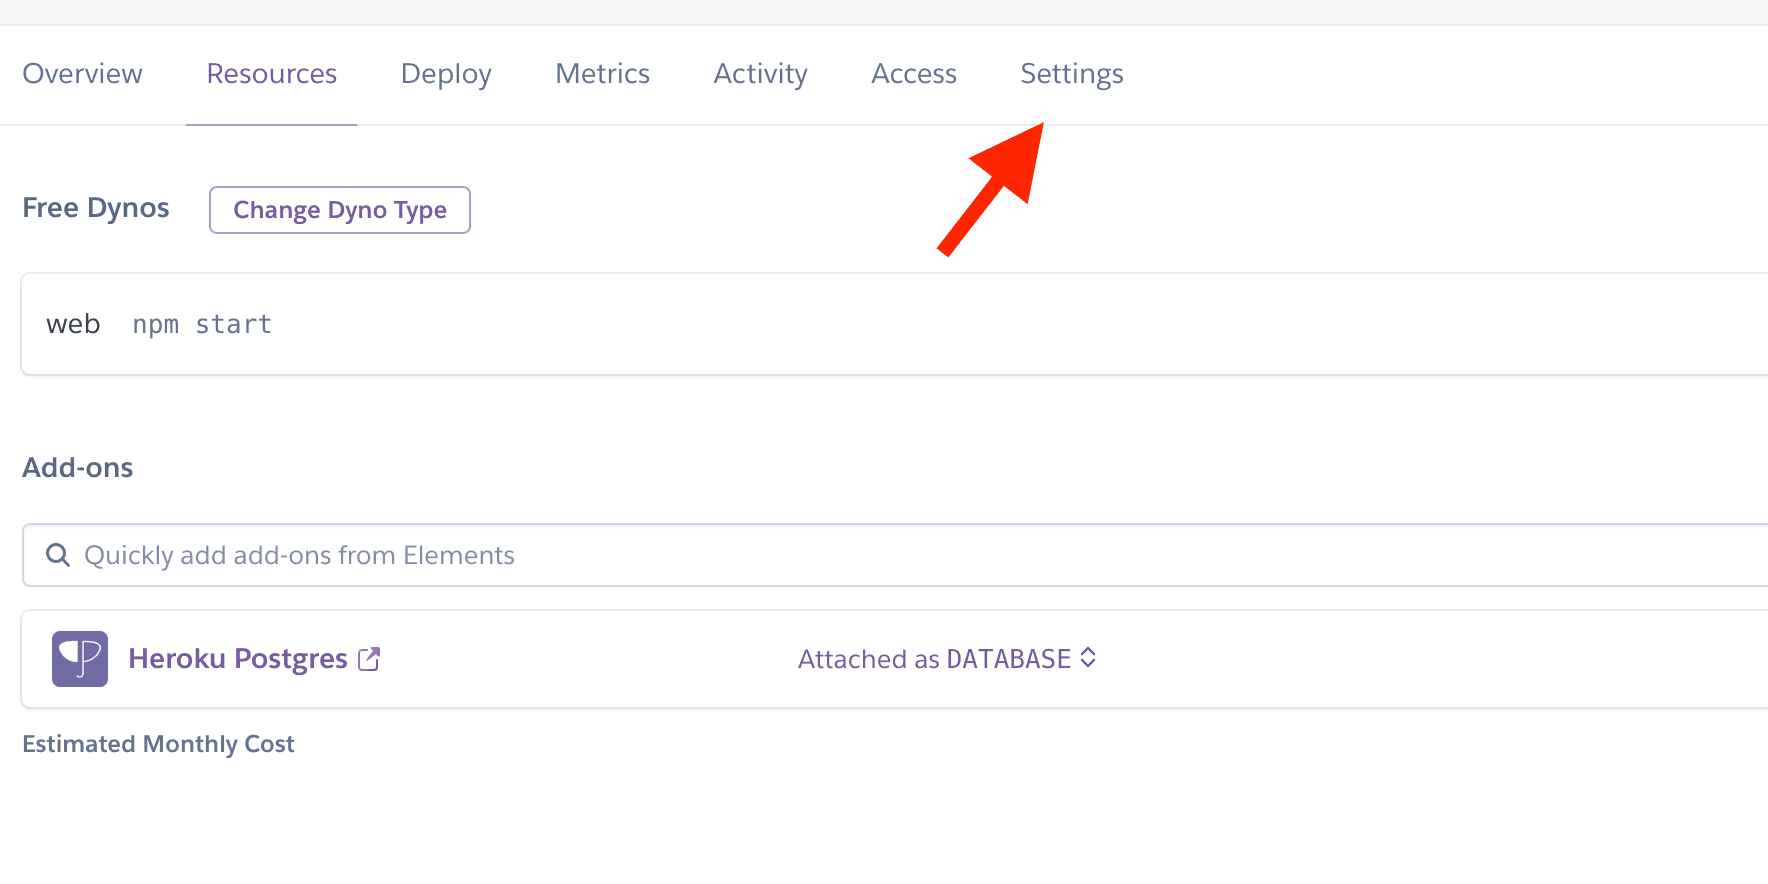
We need to set these environment variables in Heroku. Go back to Heroku and click on Settings and scroll down to Config Vars.
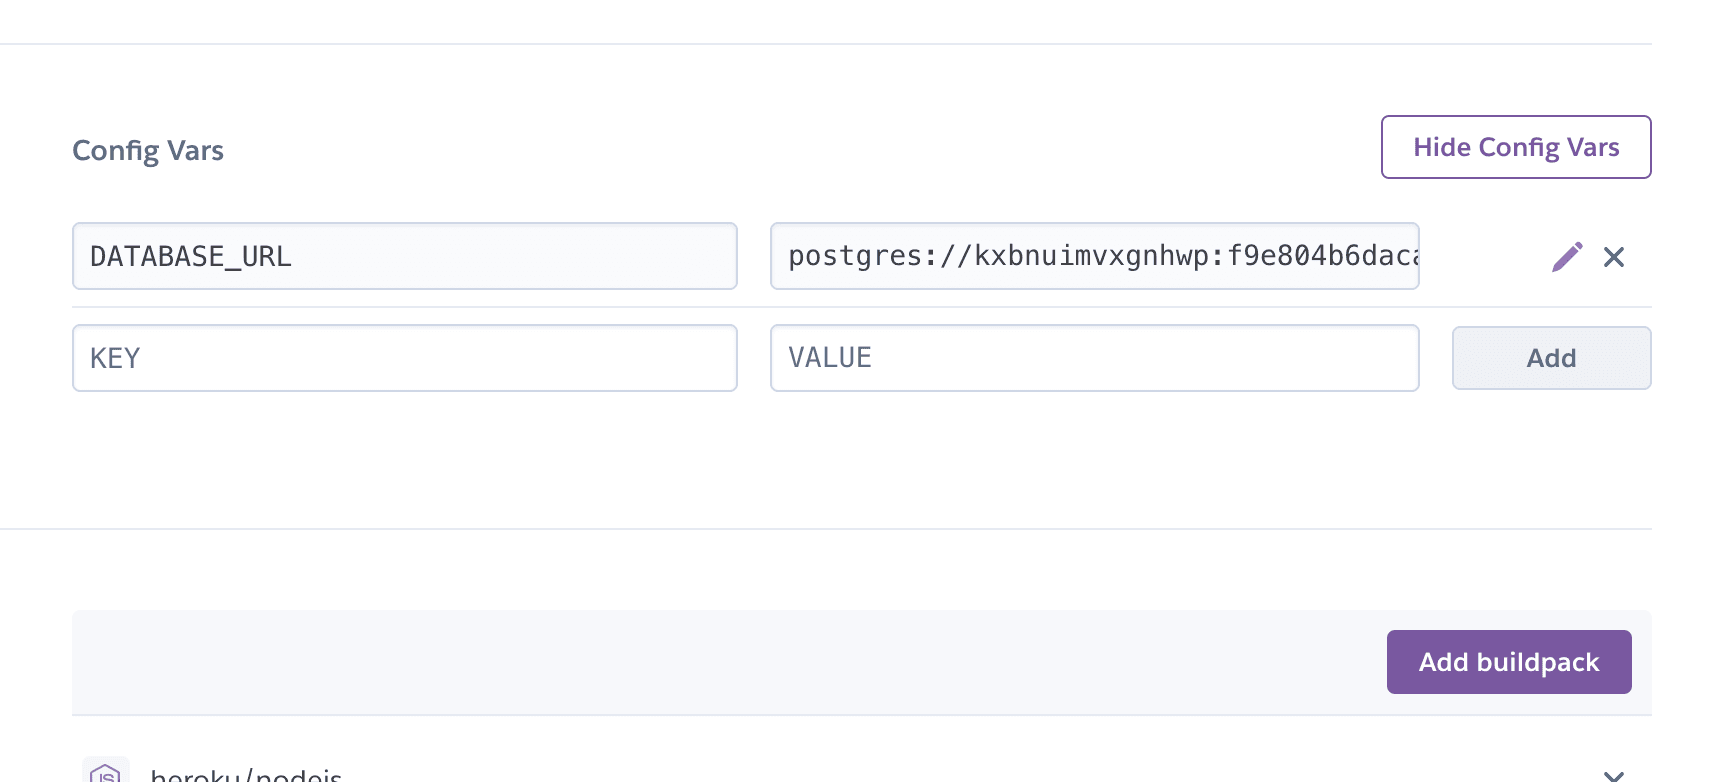
Click on Reveal Config Vars. As you'll notice we only have one config var set, which is our DATABASE_URL. We need to add APP_KEYS, API_TOKEN_SALT, ADMIN_JWT_SECRET and JWT_SECRET here.
We are going to add base64 strings of length 32 for these values. You can go to generate.plus to help you generate these. While we are here, we will also set NODE_ENV to production and MY_HEROKU_URL to <your app name>.herokuapp.com/. If you have forgotten your Heroku app name, scroll to the top of the page and click Open app, which will take you to your Heroku URL, which contains your app name. If you do this, it will likely show an application error, you can ignore this for now.
After you have added in all of the environment variables, it should look something like this
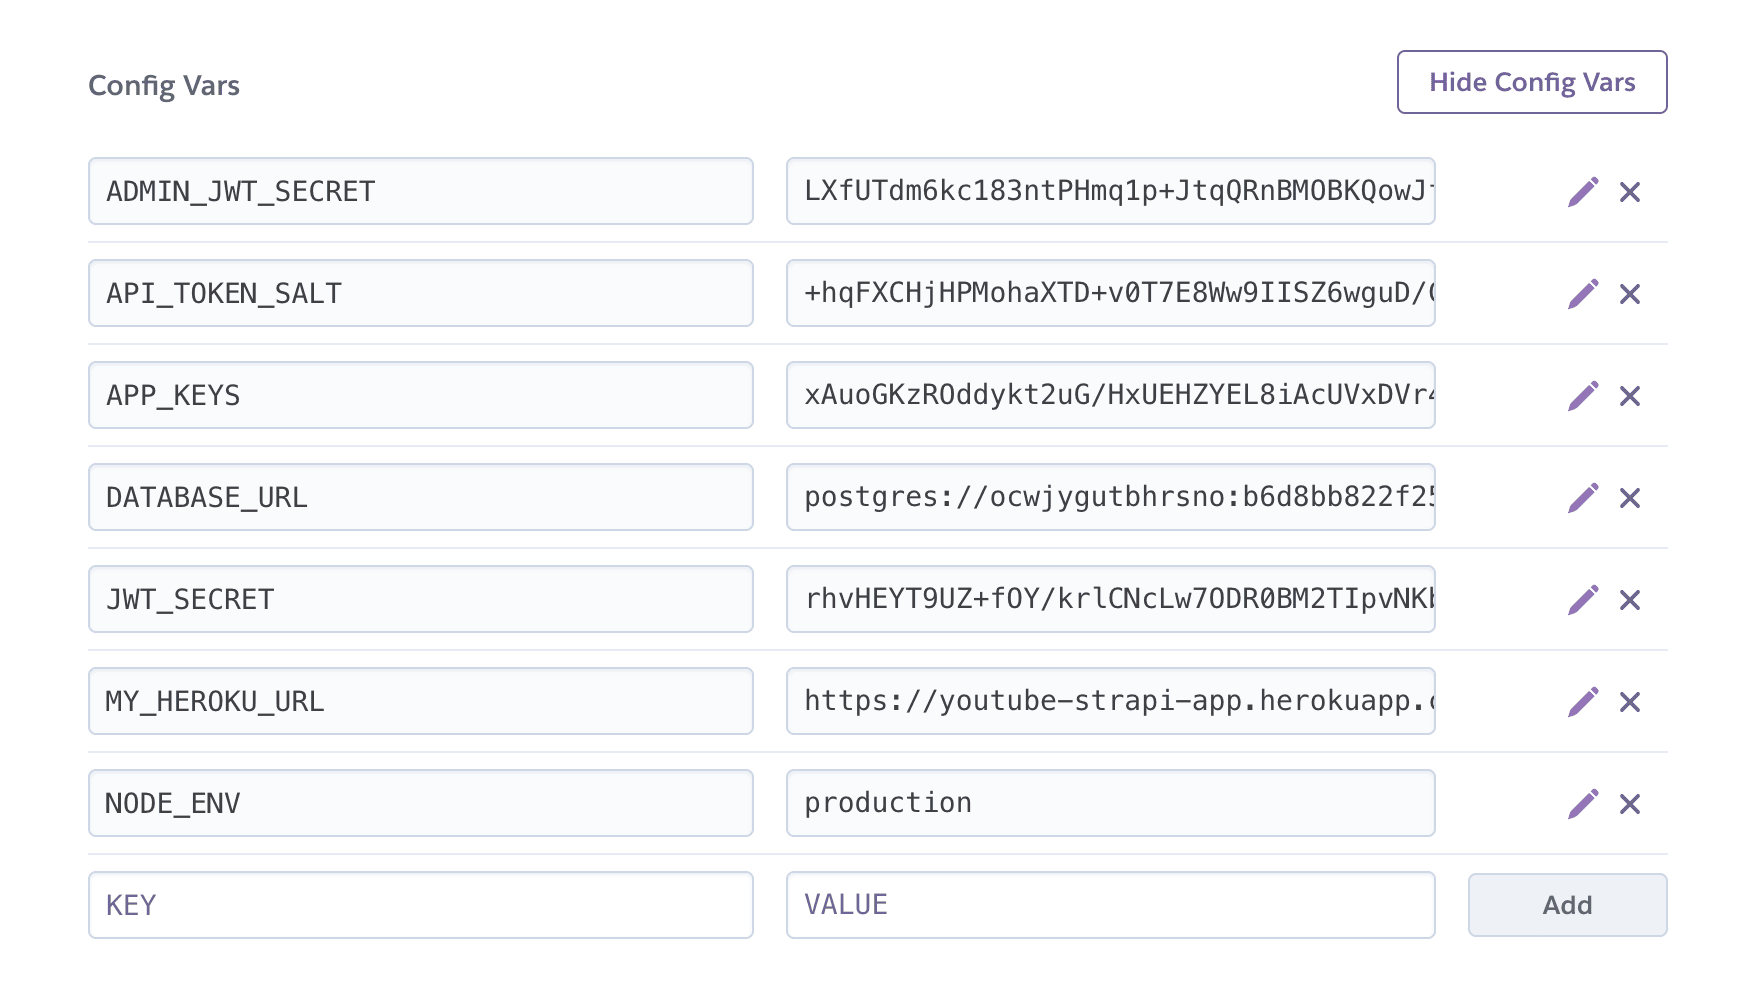
And that is it! Your Strapi project is now deployed to Heroku. You can scroll to the top of the page and click on Open app to open your application. You can then navigate to <your app name>.herokuapp.com/admin and create a new super user and get started using your deployed Strapi project.
If you liked this tutorial, you may like the YouTube video I made where I created a blog with Next.js, Strapi and GraphQL.. Check it out!


About the Author
Open for work
Hi, I'm Ryan from Adelaide, South Australia.
I'm a web developer and computer science tutor. I also rock climb, play wheelchair basketball and brew beer.
Check out some of the games I made


Smug Chicken
The daily AI art word game.

Searchle
How does google autocomplete this search?

WhereTaken
Guess the country from a photo.

Retro Snake
Eat the food but don't hit the walls or your own body!